The Importance of Drawing as Studio practice for artists

Why Artists Should Make Drawing a Daily Practice

 About a century ago (well I exaggerate a little); I was a college student studying art at McDaniel College in Westminster, MD. I had a brilliant and successful art teacher named Steve, who demonstrated how the practice of art-making and the hatching of new ideas could be brought to life, using a sketchbook.  He taught me many useful things, such as how to keep an art sketchbook pasted with photos of artwork by artists I admired, and how to write an artist statement that reflected my unique artistic voice. Above all, his most important advice was that I should draw every day. At the time, that task seemed quite difficult to stick with. I was always an impatient artist as a student and I often rushed through the drawing stage to hurry up and get to the painting. I learned later that that was a mistake. Now that many years have passed since my graduation from McDaniel, I can truly see the wisdom of his advice.

In hindsight, I realize that he was so right about drawing every day. Now, I no longer rush artwork and I have learned to love drawing, whether it becomes a painting or not. In fact, I have embraced his advice of a daily drawing habit at various times in my life, and I have worked on several art challenges for both human portraiture and pet portraits on my Instagram account. One of these challenges is called 100 faces in 100 days, in which I drew a pre-selected photo of a celebrity using only pencil and paper. I did not add in a lot of detail or shading and I limited myself to 45 minutes a day. The process of a drawing challenge gave me many opportunities for both successful drawing and ones that I didn’t like, but it helped me to see my progress, and that the practice bore much fruit in terms of learning to take the time to really observe my photo references and record my observations on paper. You could say drawing is akin to yoga or meditation because you need to be completely mindful in order to capture the nuances prevalent in realistic drawing.

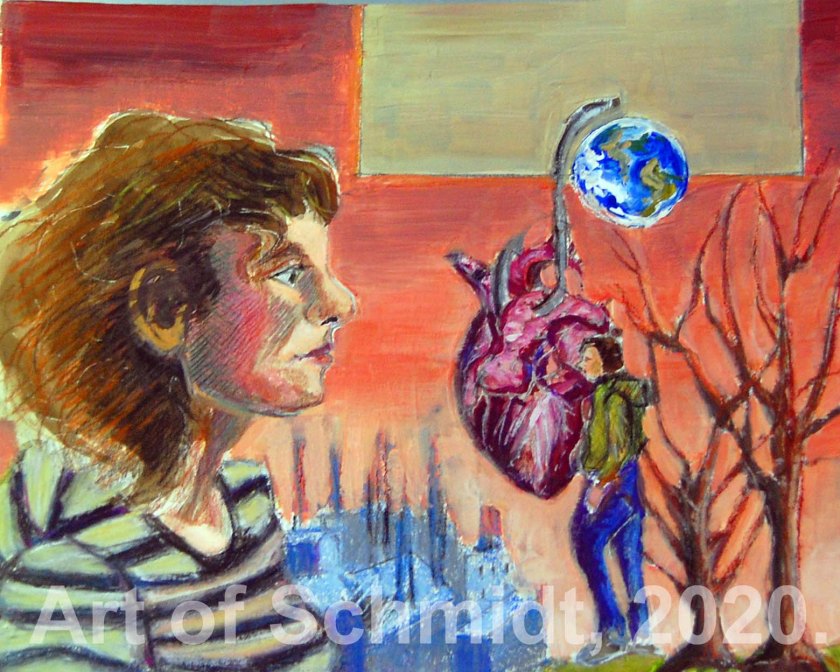
At present, I am struggling to carve out time for drawing. Sandwiched in between working, and preparing an art portfolio for graduate school applications, and other responsibilities, I am striving to make time at least 1x a week to draw. This time, I am focusing on making mixed media pastel and torn paper collage drawings. These take several days to complete so I only post about 1x a week on my Instagram account.  But this working process works well for me, as the breaks in the

The World painting, flat
Stage 4: I began composing this piece by moving elements of the collage back and forth until I was happy with them. Then I had to cut them all out and paste them to the masonite. I created an entirely new sketch for the self-portrait and painted it in oils instead of acrylic so I could get more working time to blend and smooth the edges. 


Detail work, small
Stage 3: Next, I decided to paint my individual details and then add them to the substrate as collage pieces. I had to try several different adhesives to make these collage pieces stick from crazy glue to heavy acrylic gel, with varying degrees of success. The collage pieces were constructed on the illustration board, and are remnants of my first attempt at this painting. I used canvas paper for the parts I completely re-painted, such as the self-portrait profile figure.
The world, gradient, small
Stage 2: I started an entirely new painting on a new surface, using water-mixable oils on a masonite board as my support. 
First attempt, small
Stage 1: This was my initial sketch, created with acrylic, colored pencil, and pastel on illustration board. However, I wasn’t happy with it because of the colors, and some drawing errors in the self-portrait. I also decided to go with a more realistic style in the portraits and paint in tone rather than crosshatching in the final piece. 

action, give me additional time to evaluate the accuracy of my drawing proportions and the values in my shading. The most important take away I can say about drawing and getting good at it, is that it really helps your art practice to flourish. For instance, once you have the drawing and composition mastered, you can enjoy the next step more fully, whether its collage, painting or some other art form such as graphic design or sculpture. With an accurate drawing, you won’t have to worry about continuing to fix it and can fully embrace your next steps, and I am learning that it’s so much better to take the time and lay a good drawing as your foundation for your art.

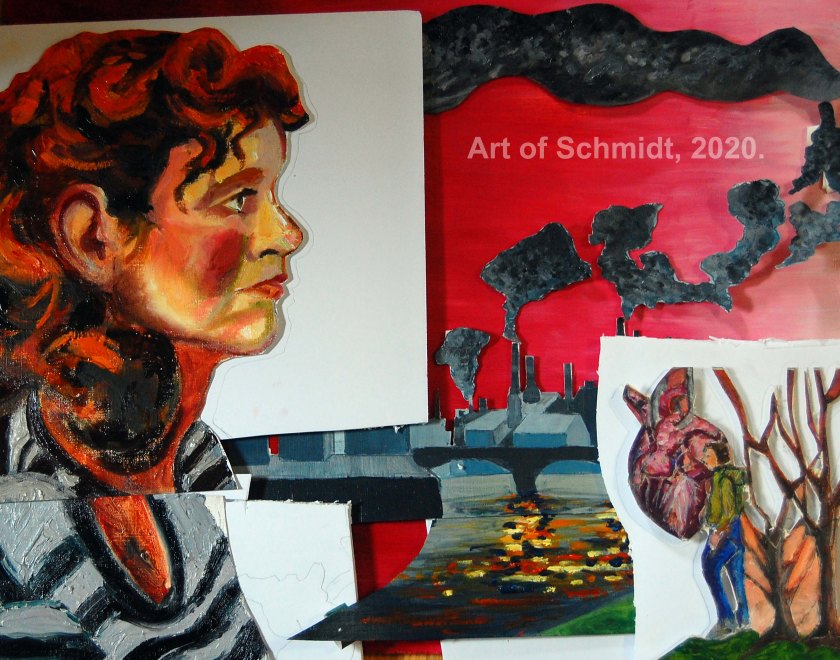
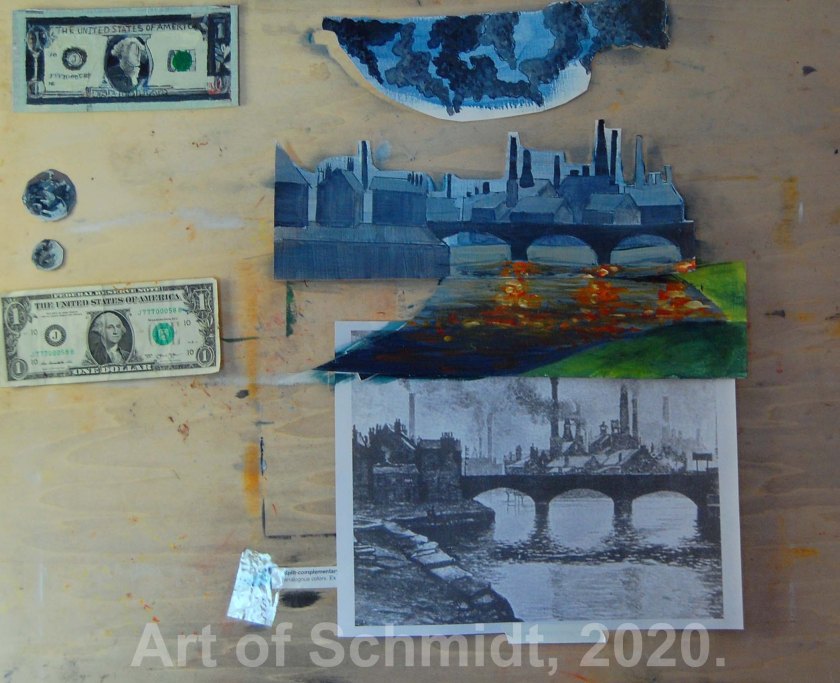
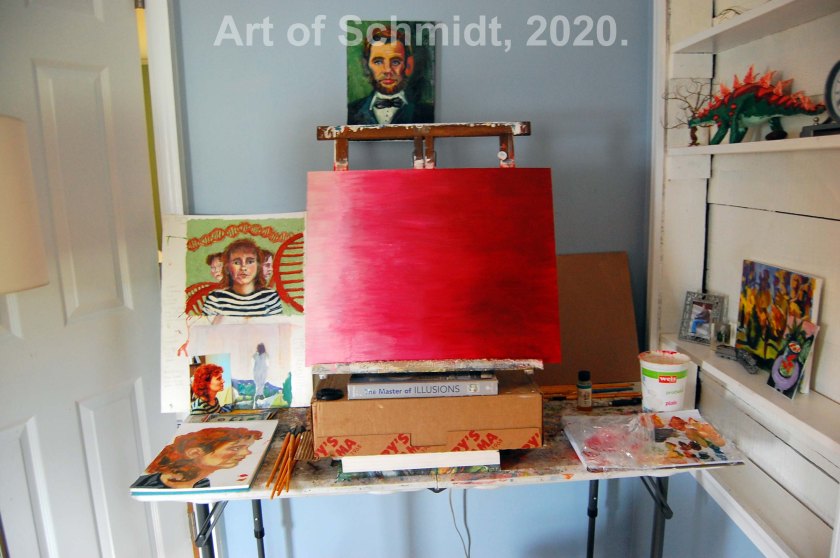
A good case in point was my latest painting in progress, Money is the Bait, which started out unsatisfactorily because of several drawing errors in the initial portrait. I ended up starting from scratch in oils on a totally new surface, and it still isn’t finished. I hope to finish it by next week. Thanks for stopping by! If you want to follow my progress with the mixed media portraits, you can follow me on Instagram under my profile name, jsjschmidt.

On and Off the Wall, Art Show at the Artists’ Gallery in Frederick, MD

Hello Friends, Family, and Fans,

Life for me has been pretty hectic, so some things like blogging have unfortunately been tabled for a while. Today, I wanted to share some photos I took of the On and Off the Wall Box show at The Artists’ Gallery in Frederick, MD. The show features a variety of local artists’ work in a variety of mediums in everything from sculpture, collage to oil painting, etc. Since I have been short on time, this blog post is more image heavy, rather than my usual, more thoughtful and wordy blog posts. Solitude is my completed mixed media box, which illustrates the poem, Stopping by the Woods on a Snowy Night, by Robert Frost. Each panel features a vignette of a winter landscape with text from the poem, so viewers can easily make this connection between poetry and the illustration. All of the other images are works from other local artists.

Stay tuned for my next post, which will be on how artists can effectively deal with self-doubt. For today, enjoy the images of these amazing boxes. I was amazed by the creativity of these artworks and how each box was unique. If you want to learn more about the art show, visit: http://www.theartistsgalleryfrederick.com. All art is for sale at this show, and bids for the silent auction start at $100. Proceeds from the show will help ensure the continued operation of the Artists’ Gallery, which is owned and operated by local artists. These photos are just a small sample of the beautiful and inventive artwork which comprises this show. It’s so much better to see these works in person if you can. The gallery hours are Friday and  Saturday, (12 noon- 9 pm) and Sunday, (12 noon-5pm). The show will be displayed for the month of March.  Thanks for stopping by!

On and Off the wall flier,jpg_edited-1
Flyer for On and Off the Wall, The Artists’ Gallery, Frederick, MD
Solitude front of box, with watermark
Solitude, Mixed Media, 2018, Jodie Schmidt.
Solitude side of box, with watermark_edited-1
Solitude, Mixed Media, 2018, Jodie Schmidt.
gallery wall three with watermark, final
Light Box and Iguana Box, The Artists’ Gallery, Frederick, MD
gallery wall 4, with watermark, final
Icon and Geometric Collage, The Artists’ Gallery, Frederick, MD
gallery wall five, final
Animal Portraits, The Artists’ Gallery, Frederick, MD
light horse lamp, with watermark, final
Light Horses Lamp, The Artists’ Gallery, Frederick, MD
lady liberty collage, with watermark, final
Lady Liberty Collage, The Artists’ Gallery, Frederick, MD
Mixed Media collage, final
Mixed Media Collage, The Artists’ Gallery, Frederick, MD
Butterfly Box, final
Butterfly Box, The Artists’ Gallery, Frederick, MD

Master Copy, Girl with a Pearl Earring, Tutorial: How to Mix colors

Last week I demonstrated how to start a master copy of the painting, Girl with a Pearl Earring, by Vermeer, ca. 1656. I demonstrated the initial stages of selecting a color copy reference of the painting, explained how to draw a grid, described a method of tracing by using a window and finished up with a demonstration on how to paint a three value painting including white, gray, and black paint. Today I will explain the process of transforming a three value painting to an initial color lay in painting.

Step One: Use Three Value Painting as a Guide to Identify Lights and Darks

Now that the painting has three values, white, gray and black I can use that as a guide to finding the lights and darks in the painting. I began the initial color lay in by trying to break down the main colors I see in the color reproduction of, Girl with a Pearl Earring. The seven main colors I noted in this painting were: Blue, Yellow, Yellow Ochre, White, Black, and a light flesh tone. I got the idea to do an initial color lay in from the book I mentioned last week, The Complete Oil Painter, by Brian Gorst. I laid out these basic colors from Liquitex Acrylic Paint brand on my palette: yellow ochre, titanium white, ultramarine blue, napthithol crimson, burnt sienna, ivory black, primary yellow. I added tomato red to my palette as a substitute for alizarin crimson. Using a palette knife, I began mixing up the colors I wanted using large amounts of paint to make nice large piles of paint, which I call a color string.  I began the painting by starting with the darkest value which was a bluish black in the background of the painting. To create this dark value, I mixed ultramarine blue and ivory black.

After I had established the darkest value and painted in the background area or negative space, I started painting in the middle values such as the blue turban, the gold robe, the light yellow scarf, and the fairly light skin tone. For each color, I mixed up two values one was darker and the other was lighter. To make lighter values, I added small amounts of white to the pre-mixed initial local color. And to darken a color, I added ultramarine blue or burnt sienna. I reserved using black for the darkest colors. Periodically, I sprayed the canvas and the palette with water to keep the paints wet, so they wouldn’t dry out. I saved the lightest lights for last, such as the whites of the eye, the fur collar and the highlights in the eyes and mouth. To keep the edges between each value soft, I painted quickly, using two large brushes with light and dark values painted right next to each other and allowed them to “melt” into each other. This technique is called painting wet into wet, and keeps the painting from having harsh outlines. After I had painted out all the white areas, I began painting in the shadowed areas of the painting, including the face, the turban, the scarf, and the robe. Important: Remember to wash out your brushes in a water jar every time you switch colors and use a paper towel to dry off the paint brush so it won’t get too watery. Also, make sure that the paint doesn’t dry on your brushes and be sure to clean each brush thouroughly in water after you complete a painting session.

Step Two: Take a Break from Painting

This next step of taking a break, may seem counterintuitive, but I find it helps me to be more objective about a painting’s progress. After I completed the initial painting session, I took a break for several days to get a fresh take on it. When I returned to the painting, I wrote down a list of things I would like to change and I checked the facial proportions to be sure that the drawing was correct. In the next session, I corrected things like proportions, added shadows with a glazing technique,  and tried to make more accurate color matches. To help obtain more accurate color mixtures, I researched Vermeer’s palette and painting techniques. And to create the glazed shadow areas in this painting, I used a Slow Dri blending medium by Liquitex in my darker paint mixtures to thin out the consistency of the paint.